Thursday, December 15, 2011

Coldy cold and soupy soup

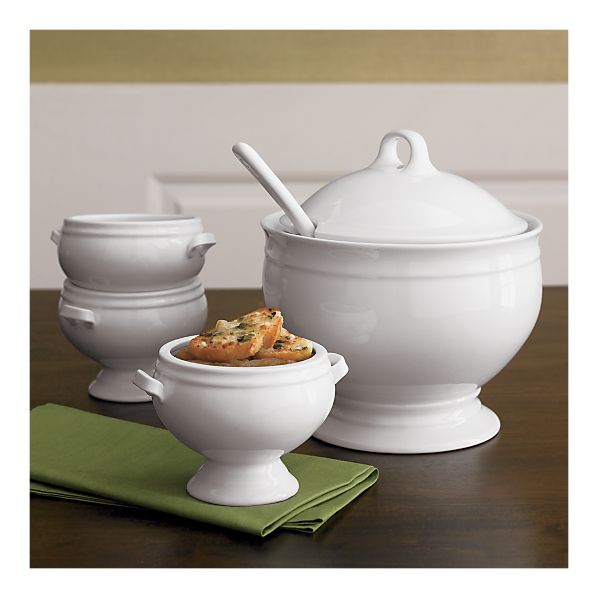
(Footed soup bowl from Crate and Barrel)

I can't believe I last posted in August!
The weather is much colder now and we eat a lot of soup. One of the favorites is French Onion. Not the kind that you have to spend an hour caramelizing the onions and making the stock from scratch.
Though, if you've got the time, I recommend the Julia Childs recipe. Three kids hanging on my leg doesn't always allow time for Mrs. Childs wonderful soup, so I make it this way:

Please keep in mind, this is one of those recipes that you don't have to be to exact. Taste it along the way and make your adjustments. Your bowls do need to be oven proof and I recommend a crock or large ramekin style. I love these footed soup bowls from Crate and Barrel. http://www.crateandbarrel.com/dining-and-entertaining/individual-bowls/footed-soup-bowl/s408328 We get so much use out of them and they are just fancy enough to serve for guests.

French Onion Soup
Serves 2-3


Ingredients:
2 yellow onions, halved and sliced thinly
olive oil
1 pint of stock, beef, chicken, or vegetable
2-3 springs of fresh thyme
1 cup Gruyere cheese,(or half Gruyere and half Cheddar) grated
1 glug dry sherry or brandy (yes, glug - tip the bottle into the broth as it simmers and listen to the sound)
salt and pepper to taste
Crusty Bread, the more grains the better in my opinion, cut into rounds to fit the bowl that you will use to serve 


Method:
Heat the olive oil over medium high heat in a wide sauce pan. Add in the onions and saute, stirring frequently. Season the onions with salt and pepper. When the onions have a nice golden color, add about 3 oz. of the stock and stir up all the brown bits off the bottom of the pan. Lower the heat to medium low and add the rest of the stock and sprigs of thyme. Add in the glug of sherry or brandy and let simmer gently another 5-10 minutes.  At the end of this time, remove the thyme stems.
Meanwhile, turn on your broiler or turn on your oven to about 400 degrees F or 205 degrees C. Line a sheet pan or cake pan with foil and place your oven proof bowls on top. Carefully, ladle soup into the bowls up to about 1/2 inch of the top. Set the bread round on the soup and let it absorb the soup a little bit. Press it down very gently and then put the cheese on top. The cheese should cover the bread. This is a great time for a bit of fresh cracked pepper.
Lightly scrunch the foil around the base of the bowls to help keep them stable. Carefully, place the pan in the oven and wait for the cheese top to turn a golden brown and bubble slightly. You will need to check the oven frequently, as only you know your oven. When the top is done, carefully remove the pan and set it somewhere to cool a bit. The bowls will be HOT! Let them cool for about 5 minutes or so until the bowls they are cool enough not to burn.


Serve the soup with a green salad. Remember the cheese will also be Hot, but tasty.


Enjoy!


Saturday, August 20, 2011

Sweet Chili Roasted Duck

Originally, this was supposed to be a maple glaze, but I didn't have any syrup. Which just goes to show, check your cupboard before you make a new recipe!
Any way, I think this turned out much better. I know the temp seems high, but trust me, you want it that high to render out the fat from under the duck skin. Serve the duck shredded with cucumber,carrots and hoisin sauce over lettuce.
BTW - this is very easy, the name makes it sound like a lot more work than it really is.

Serves: 3-4
Ingredients:
Whole Duck 1.5  - 2.5 pounds
Salt
1/8 tsp - Ground Black Pepper
1/2 tsp - Granulated garlic (or garlic powder)

Store bought sweet chili sauce
or
Sriracha sauce
1/2 cup strawberry, plum, or apricot jam

Preheat the oven to 400ยบ F.

Pierce the duck skin all over with a kebab skewer. Rub with salt, ground pepper and garlic powder. Place the duck on a rack in a roasting pan and into the oven for about 50 minutes. Rotate the pan halfway through cooking.

While the duck cooks, make your sauce, if needed. Heat the jam until a little runny and add in Sriracha sauce to taste. The idea is to have a little bit of heat, but not make the sauce all that spicy.

Remove the duck from the oven and pour over about 1/4 cup of sauce. Put the duck back in the oven and continue cooking for another 10 minutes. Keep your eye it! You need to make sure the sauce doesn't turn black and burn.

Let the duck rest for 5-10 minutes and then dig in!

Thursday, February 24, 2011

I say tomato, You say Tomahto

(That's actually how it's now said in our house after a year in London.) But that's another story for another blog...
The food, the food, that's what we're all about here!


Over the past several weeks, I have been receiving lots of tomatoes with our organic food box. What to do, what to do? I've got it! Sun-dried tomatoes!
Oh, wait, this is London, in February. We get sun, just not vast quantities for days on end. How about using the sun in my oven? Now that's the ticket, oven dried tomatoes for pasta sauce, pizzas, salads, fish, the list goes on...


Oven "Sun" Dried Tomatoes


8 or more tomatoes, cut across. You can use any type that you like, or have too many of.


Olive oil for drizzling


3 to 5 garlic cloves still in the skin


sea salt


dried herbs - rosemary, thyme, basil - optional


sugar - optional if the tomatoes aren't sweet enough


Place the tomatoes cut side up on a tray. Drizzle with a bit of the olive oil. Sprinkle a little sea salt over each half, as well as the sugar if needed. Top with the herbs, if desired, I didn't use any here. Scatter the garlic cloves around the tray. 


Place in a 250 degree oven. Start checking the tomatoes at 2 hours. How they finish is a matter of personal taste and how your oven works. 


In my oven, 3.5 hours gives a chewy, still moist tomato, that is caramelized on the outside. 
To store, pack in a jar with olive oil, keeping in mind that the oil, must come all the way over the top.  Or pack into the freezer for a quick addition to soups, and sauces.


Personally, all mine will get roughly chopped and mixed with onions and ground turkey for a nice change to typical spaghetti with meat balls!


Sunday, February 13, 2011

Happy Valentines Day!

My mom used to make heart shaped coconut macaroons and dip them halfway in chocolate. mmmmm
There are so many macaroon recipes out there, try your favorite, or use this easy one! I


Coconut Macaroons Dipped in Chocolate

Ingredients

  • 4  large egg whites
  • 2  teaspoons  vanilla
  • 2/3  cup  sugar*
  • 1/4  cup  all-purpose flour
  • 3 1/2  cups  desiccated coconut (available at health food stores) *

  • 2  tablespoons  butter
  • 5  ounces  dark chocolate, chopped

Heart shaped cookie cutter

Preparation

In a bowl, with an electric mixer on high speed, beat egg whites until frothy. Beat in vanilla, sugar, and flour until well blended. Stir in coconut.
Holding cookie cutter on parchment lined baking sheet, fill with about 1heaped tablespoon of coconut batter  for a small heart and 2 tablespoons for a larger one. Gently press mixture down so the thickness is even across the cookie. Slowly lift off the cookie cutter using the spoon to help press the cookie through onto the parchment. Keep them about 2 inches apart, though they shouldn't spread much. 
Bake in a 325° oven until macaroons are golden, about 20 minutes; if baking more than one pan at a time, switch pan positions halfway through baking. With a wide spatula, transfer macaroons to racks to cool completely.
 In a heatproof bowl set over a pan of barely simmering water (bottom of bowl should not touch water), stir butter and chocolate often until smooth, 5 minutes. Hold a macaroon on one edge and dip other side into chocolate to coat half the cookie. Shake off excess chocolate. Set macaroon on a waxed paper-lined baking sheet. Repeat to dip remainder. Chill, uncovered, until chocolate is firm, about 30 minutes.

Makes about 24 small hearts or 12 large hearts
* If you can't find desiccated coconut, use the regular shredded kind, but decrease the sugar by about 1/2. Or leave it in if you like them really sweet!